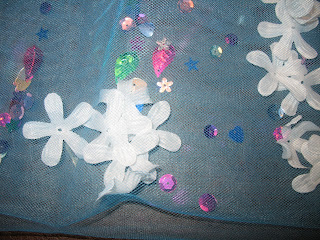
The tutu I'm featuring for you today is a filled tutu, I saw something similar on "The Martha Stewart Show" for Halloween and I made it work for The Niece. I am thrilled with the way it came out. It's very easy to do. The following directions make a tutu that would fit your average 2 to 6 year old but it would be very easy to do to make it smaller or bigger as you see fit.
Supplies:
Tulle
1.5 inch wide ribbon (I used grosgrain)
stuff to fill your tutu
thread, pins and other sewing paraphernalia.
You start with the standard tulle that you'll find at any fabric store, I am not sure of the width but it's all pretty much the same, You'll need 1.5 yards or more if you want it really puffy. You're going to fold it in half and then in half again. Sew up the shorter sides, keep the fold at the bottom and leave the top, open.
 After you complete that you should have a two-layered pocket with a large opening at the top. Use that opening to fill your tutu with any kind of cute, glittery, girly stuff you want. I used white flowers and multi-colored sequins.
 Cut yourself a length of ribbon about 22 inches long. This will be the inside of your waistband. I folded in the edges on the side before I pinned the tulle to the ribbon band. Find the middle of your tulle, leaving the opening at the top. Pin the middle of the tulle to the middle of the waistband and pin the edges of the tulle to the edges of the ribbon. Pleat/gather the tulle and pin it evenly along the ribbon waist band.
 It should look something like this:
 Stitch the tulle to the ribbon. Remember, this is going to be the inside of the waist band so don't worry if it's not totally neat. Next, cut yourself a length of ribbon approximately 65" long. Find the center and pin the center of that ribbon to the center of the portion you already sewed, sandwiching the tulle between the two ribbons. Pin and stitch these together, you'll want this to be neater since this will be the side that shows. I did a seam along the top and bottom of the ribbon. It wasn't perfectly neat but it's a dress-up tutu so I didn't freak about non-neatness.
 That pretty much sums it up... Here is the finished product, modeled prettily by a beautiful four-year-old girl.
 I also made this one with the same method but didn't fill it with anything, it already has metallic, rainbow colored stars on it and any one who knows fashion knows that metallic, rainbow stars stand on their own just fine.
 Pretty huh? Yeah, the skirts are cute too!
Have a great day everyone!


2 comments:
what a cute little model! ;)
Love the tu-tus!
They came out so cute & the model is very cute. :o)
Post a Comment